Showing posts with label tutorial. Show all posts

Sunday, June 26, 2011

Sunday School Tutorial: 3-Ring Binder Mini Album

Good morning CraftyStealers!

 
I gave you all a sneak peek of my American Crafts Confetti Birthday mini on Thursday, and as promised, I will show you how I did it.  I chose this design because I need a mini-album that I don't think my kids will rip apart.  Having two small children, I've always been a little bit wary of putting time and effort into an album that may or may not stand up to little fingers.  Then, I came across this tutorial on YouTube, from FollowThePaperTrail, and thought it was the BEST idea! (By the way, she is a mini-album genius, and has many more tutorials and patterns).  It's basically a do-it-yourself 3-ring binder.  It was SO easy, and I'm crossing my fingers that it will be able to endure my kids thrashing it for years to come.

 
Here's what you will need:

 
  • Plain chipboard cut into three pieces: 2 pieces that are 4.5"x5", 1 piece cut to 4.5"x1.75" (I used a sheet of plain 12"x12" chipboard)
  • 1 - 6"x12"piece of patterned paper
  • 1 - 10.5"x4.75" piece of coordinating patterned paper (you can just use a piece of double sided patterned paper to make both)
  •  3 - 1" binder rings
  • Heavy duty hole punch with a long reach (I used a WRMK Crop-A-Dile Big Bite)
  • REALLY good adhesive
  • 4"x4" pieces of double-sided patterned paper (for album pages, so as many as you'd like)
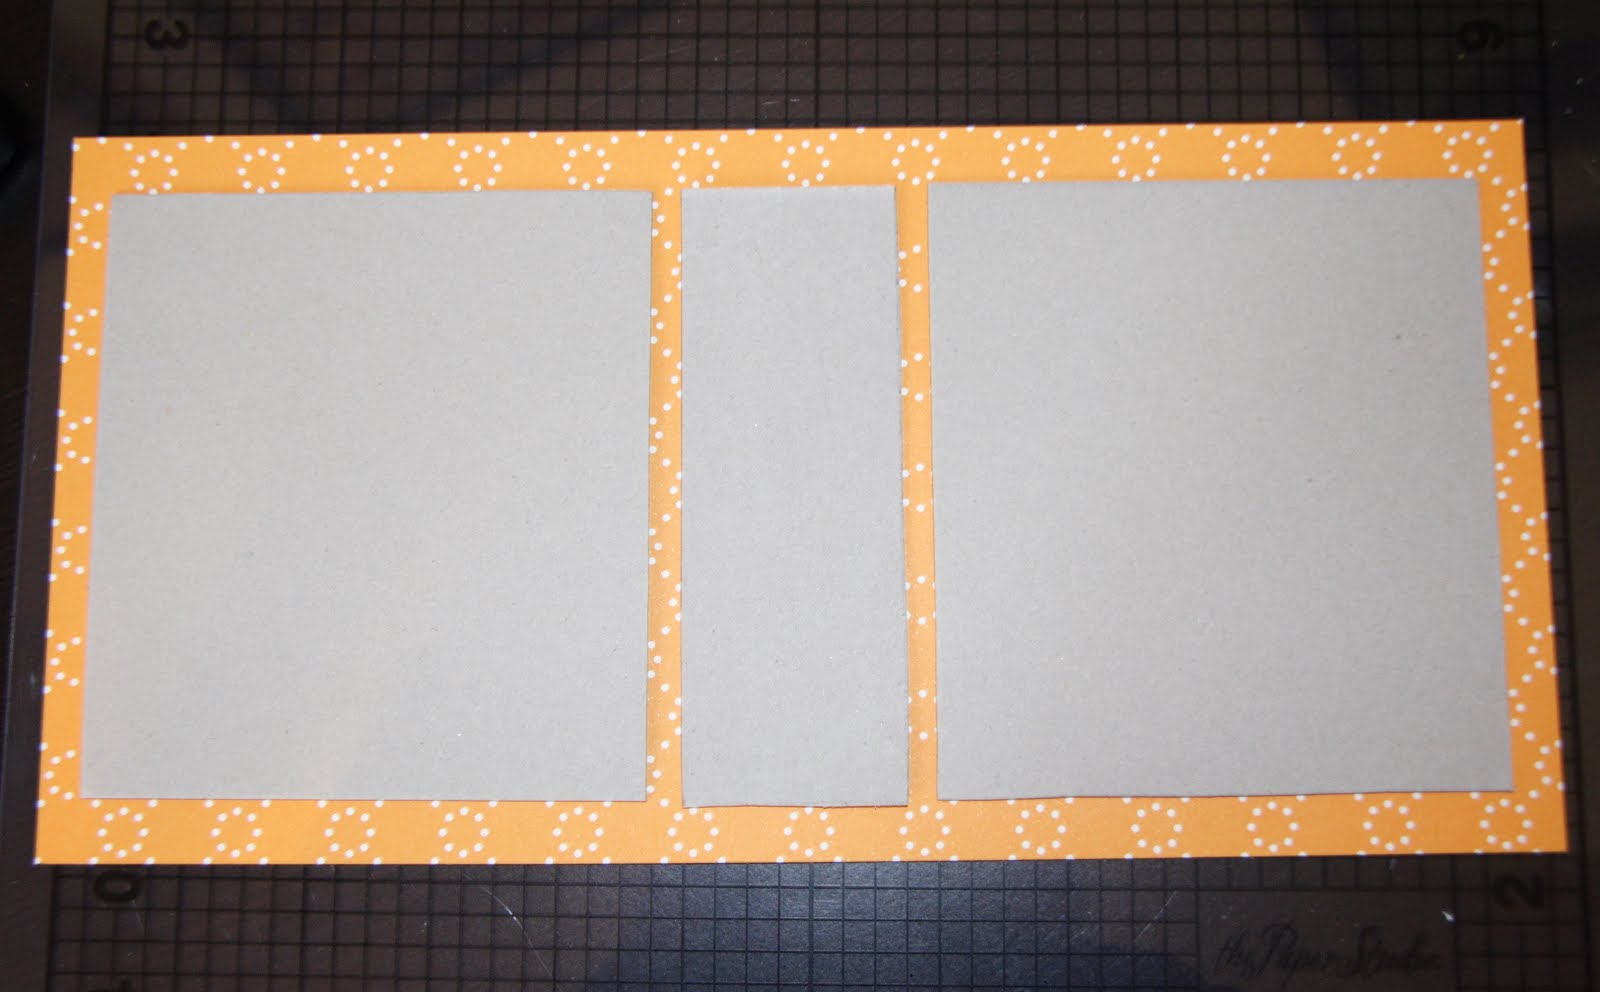
Apply adhesive to one side of each of the 3 pieces of chipboard.  Place them adhesive side down onto your 6"x12" piece of patterned paper as shown below, making sure to put the side of your patterned paper with what you would like to be your cover pattern, facing down. 

Snip off the corners of excess paper at a diagonal - but don't cut too close to the corner of chipboard.
Now put adhesive along the edges of paper and chipboard.  Fold the short edges of the paper onto the chipboard to "wrap" the chipboard.  Do the same with the longer edges.  Make sure the paper is firmly adhered to the chipboard.
Now you take your coordinating 4.75"x10.5" paper and put adhesive along the outer edges of the "wrong" side.  This will be the inside of the cover. Centering this piece, place it on top to cover the remaining naked chipboard.
Now bend the cover at the seams.
Time for the ring part of this three ring binder.  The vertical placement of your rings is up to you.  I spaced my evenly along the spine.  So I put dots at 1", 2.5" and 4" along the lenth of my 5" spine.  Then I made another identical set of dots 1" to the right.
Punch out the holes, making sure the hole will be big enough to accomodate the width of your ring. 
Wiggle the rings into the holes so that the clasps are on the inside and the joint is along the outside of the spine.
Outside cover is finished! All that is left is to fill it up with pages.  I made my pages fairly simple - all but one are 4"x4" sqaures.  The last page is 4"x7" and folds out.  I did this because I made these minis to showcase pictures I took each month of my child's first year - and wanted to make the 1st birthday page a little bit more special.  I added journaling to each month's page, citing a few special things (walking, words, favorites) at that point in their new little life.  Here is the finished product!
And of course since it would be unfair to make one for my son and not for my daughter, here is the girlie version.  I let my kids pick out the cupcake stickers for the covers.  The strips at the top are patterned bar code strips - such a great idea from American Crafts so that nothing goes to waste!
If you missed this AC Confetti Birthday steal, there are a few left and Stephanie has added them to our Past Steals page! I hope you get to steal some time and have fun playing with your papers today.  Don't forget to take a few minutes to create something awesome to enter in our Birthday Sketch Challenge.  It closes tomorrow evening and our winner will get some fun CraftySteals goodies...

 
Have a great Sunday!

Sunday, June 19, 2011

Sunday School - Make yourself a floral frog

I know, I know, many of you are thinking "What do flowers and frogs have to do with crafting?" Well, I promise, there's a correlation, just keep reading! (And if you already know, kudos to you!). 

Every once in a while on a blog, or in a magazine, you will see cards being displayed on a very cute little stand that looks like a metal brush head.  Here’s an example from Martha Stewart (she uses them as placecard stands). 
Well, I thought they were a fun way to display papercrafts, and upon googling, figured out that they are floral frogs – used to hold flowers in place before foam took over.  They come in all shapes, sizes and designs, and the vintage ones I found on the internet are design pieces in their own right.  If you live near a flea market, or a great thrift shop, you might be able to find one for yourself.  Maybe even a search on Craigslist or Ebay could net you one.  I thought it didn’t seem to be too difficult of a task to try to make one myself (since I don’t live near a flea market and never have good luck on Ebay).  So I did, and here is how.

What you will need:
Wooden block
Size and shape is up to you, but you do need it to be at least ½” thick. You can get small precut pieces at craft stores or hardware stores.  (I would recommend buying real wood, not MDF – you’ll see why)
Scratch paper
Ruler
2” circle punch (optional)
Spray Paint
Nails (about an inch or so longer than your piece of wood)
Drill
Hammer
Sandpaper

First step is to make a grid for your drilling guide.  I punched out a 2” inch circle (because it would fit nicely on my piece of wood).

On the circle, I made a dot for the center, then made marks at each half mark across the circle’s diameter.  Turning my ruler 90 degrees, I did the same ½” marks again.  Then I drew lines across the marks, making a grid that looks like this:
Notice, that I made “X” marks on the places where the lines met on only TWO of the horizontal lines. For the middle row, I made “X” marks in the middle of the places where the lines meet (so at the ¼” mark, then 1/2" inch apart - clear as mud?).

Now it’s ready for drilling!  Tape the grid onto the place you’d like to drill.
Using a drill bit that is just a little smaller than the thickness of your nails, drill holes where the “X” marks are on your grid.  A tip: if you don’t have a workplace good for drilling, turn a cardboard box upside down and use it for a table (so you won’t drill holes in anything else).  A thick piece of foam would also work. 
(Note: This step is where I learned that buying a piece of MDF wasn’t the brightest thing to do.  It takes forever to drill a hole in MDF! If you noticed, I switched over to a nice piece of wood and my holes were drilled in less than a minute.)
Now, insert your nails from the back.  Hammer them into place securely (again on top of your cardboard box if you need it).  A couple of my nails are a bit crooked, but it won't matter in the finished product.
Ready for some spray painting!  Turn your cardboard box on its side and use it for a shield if you’d like.  Cover the nails and wood with paint according to the directions.  I had to coat mine twice for an even color. 
Now you have your very own stands for your cards, or layouts.  You could even make an extra long one to house your embellishments in a creative way.  Here's my new one in action...(the cute fish paper is from the Bella Blvd "Boys" Steal - take a look at this great bundle, there are a few left on the past steals page.)
Have a great day, and Happy Crafting!

Wednesday, June 15, 2011

Ideas for your Bella Doilies

Good morning CraftyStealers!

By now, you've hopefully seen today's awesome Crafty Steals, the Unity Stamp kits: Bella Doilies and Webster's Pages. (If not, head over and grab one before they are gone!).

I just dropped in to make sure you see this YouTube video (it's from the UnityTV Channel).  It's a fun technique using the Bella Doilies, Distress Inks and embossing powder to come up with this...
Here's the video:
Happy Crafting!

Sunday, June 12, 2011

Sunday School - Colored Pencils + Minerals Spirits = Easy Blending!

Good morning CraftyStealers!

The longer I work here at CraftySteals.com, the more interested I have become in stamping. I don't know whether it has more to do with all of the fun stamps that Stephanie finds, or the fact that so many of you share your incredible stamping talents and make me want to expand my crafty horizons.  In any case, I'm now adding stamps and ink to my list of craft supplies to hoard (along with thickers, patterned paper and punches).  I am also constantly searching out new (or new to me!) techniques to use with stamps.

This morning, I'm sharing a new technique that I've been playing with to color in stamped images.  It uses colored pencils, odorless mineral spirits and a blending tool. Some of you may have heard of this mentioned with Gamsol (which is a brand of odorless mineral spirits).  You can use this technique to blend colors together and make the colors looks smooth without visible pencil lines.  It's a very cool technique with what I think is a fairly small learning curve, and looks great for not a lot of work!

Here's all you need:

Colored Pencils
A note: You'll need to use a better quality pencil than the Crayola.  Many people love to use Prismacolor pencils, I actually used Staedtler pencils because I've had a set for twenty years and figured I would use them up before investing the cash in more pencils.

Odorless Mineral Spirits
As I mentioned, Gamsol is probably the most mentioned brand - it can be found in art supply stores. I don't have one in close proximity, so I picked up the Masterpiece brand at a craft store.  I've also heard Mona Lisa makes a brand sold in craft stores, and even Wal-Mart carries a cheap version. 
Blending tools 
I picked up some blending stumps at the same craft store where I got the odorless mineral spirits.  They are basically tightly rolled paper pencils.  I've also seen q-tips used as well as other blending tools.  You can experiment with what you like the best!


Now that you've got the tools, here's how to use them (well, how *I* use them, at least!).

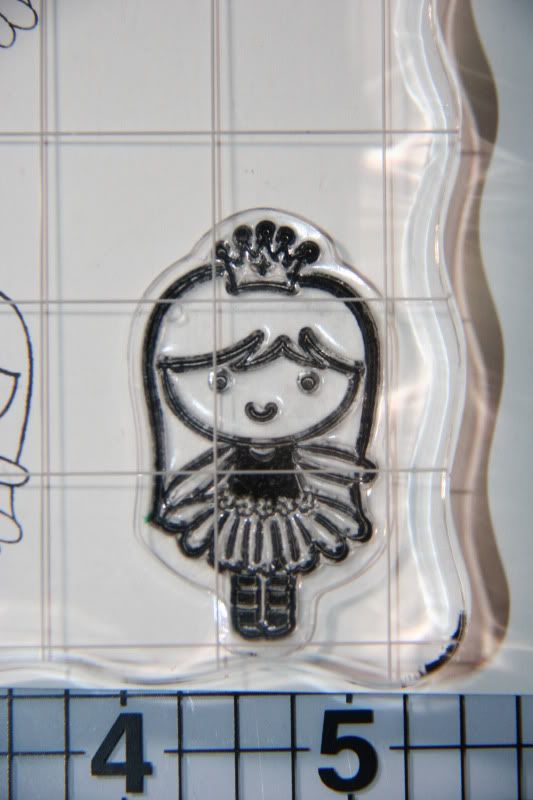
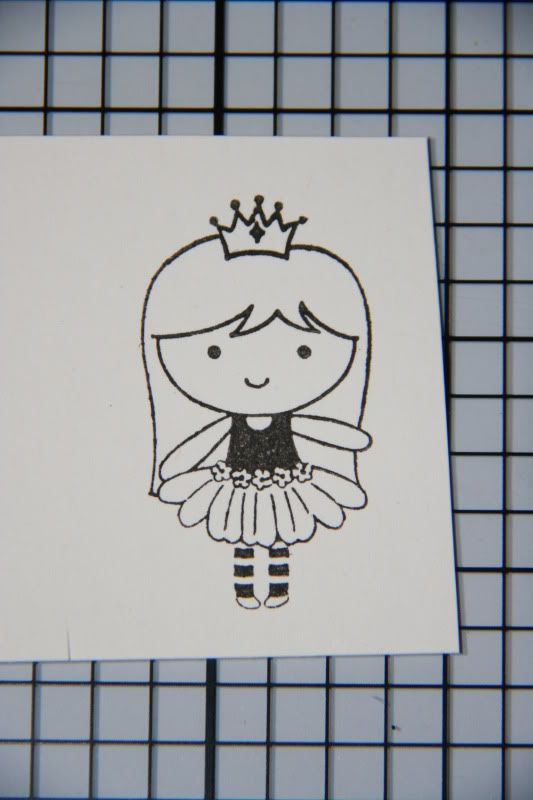
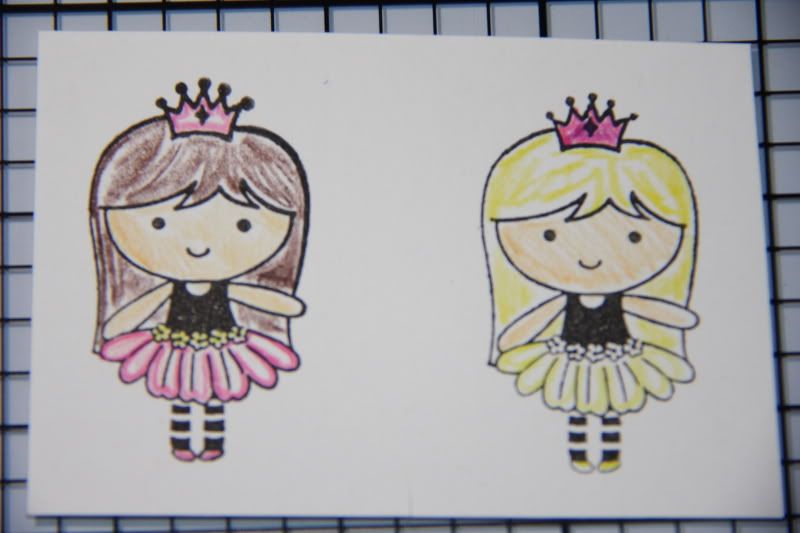
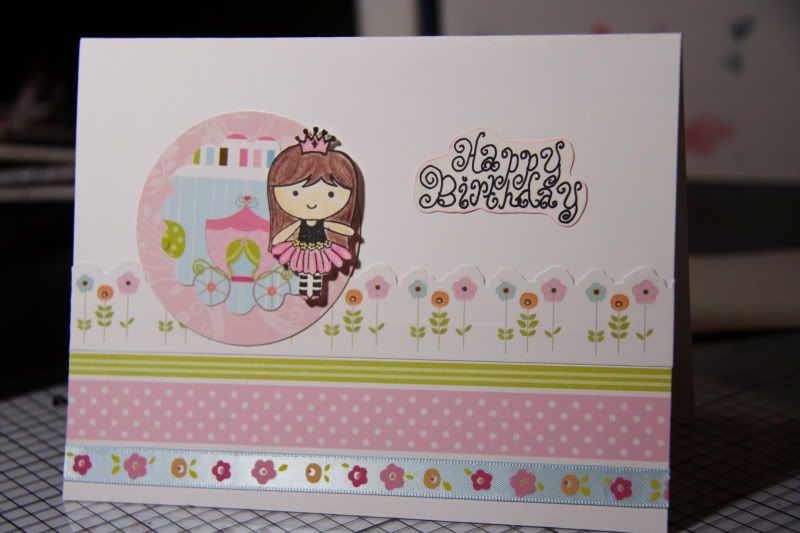
Stamp your image onto a piece of cardstock (I'm using the very adorable princess stamp from a past steal, Imaginisce's Enchanted).
Color in your image with the colored pencils.  On the skirt, I used a darker pink to outline, and a lighter shade on the center.  Also, I didn't have to be too careful with the pencil marks, as I knew they would be softened later.
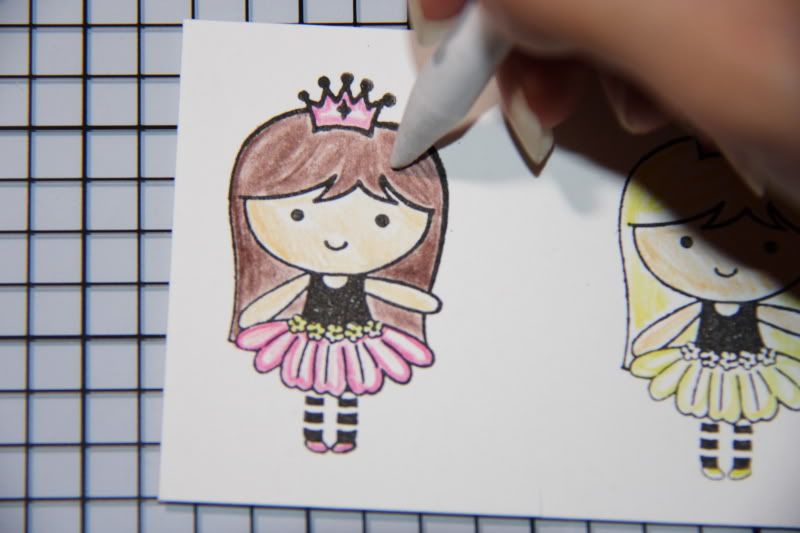
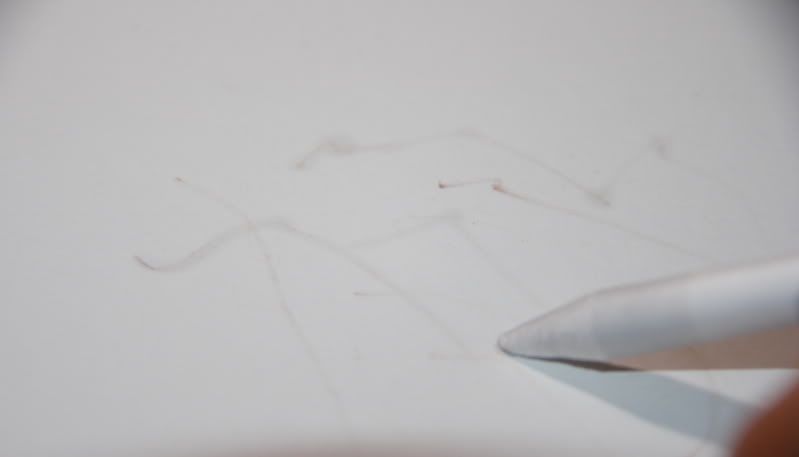
Next up, the blending! Dip your blending stump into the odorless mineral spirits, getting it wet, but not dripping wet.  Now you can carefully blend the colors together - moving the tip gently over the colors (on the skirt I went from dark to light). 
To clean off the stump, you can just rub it onto a piece of scrap paper.  It can also be sharpened like a pencil.
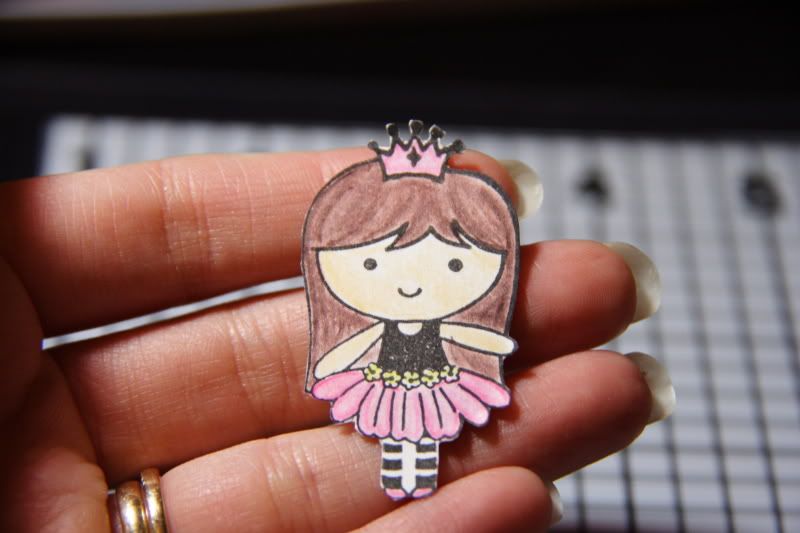
When you have blended to your satisfaction, you're done!
I cut out this sweet little princess as an embellshment for a birthday card. I finished off the card with some punched out circles and scallop-edged circles, adhesive border strips and ribbon - all from the Imaginisce line.
What do you think? I personally love that there is more control than using a watercolor pencil (at least in my experience), and it's a relatively inexpensive method of coloring (I have yet to dive into the world of Copics or similar markers).  I hope you'll like it too (if you haven't already tried it).  Don't forget to check out today's steal for some new supplies to get you started! 

Have a fabulous day, and Happy Crafting!

By the way, I *hope* the comments are working again for the blog.  Let us know if you have any issues!

Sunday, June 5, 2011

Sunday School: Busting Summer Boredom

Good morning CraftyStealers!

My son officially ended his first year of school on Thursday. (sniff!)  These first couple of weeks will be fun, with the novelty of the pool and playing with forgotten toys (in jammies all day, of course!), but I'm fairly certain that soon, the lazy days will become "boring" and so I'm getting prepared for that day now.

Last spring, I heard about a book called Photo Freedom, by scrapbooker Stacy Julian. (If you clicked the link and are wondering why the price is so high, it's an out-of-print book.)  The book is about how to organize your photos in a way that frees you to get some actual scrapping done.  In it, I saw an idea for a way to jump-start your creative process.  Basically, you have a jar filled with popsicle sticks.  On each stick, a category was written (her system has photo filing categories such as places you go, people you love, etc.), and that was where you were supposed to start!

Seeing that jar, made me think about how I could tweak the idea for the upcoming summer with my kiddos.  So I made a crude version with a plain glass jar and popsicle sticks with a bit of ribbon tied to them.  My children and I brainstormed ideas that they would love to do: play football outside, play with PlayDoh, finger paint, and build a cushion fort.  I also looked through my Disney Family Fun magazines for craft ideas, and used those on popsicle sticks too (making sure to mark the issue and page I'd gotten the idea from). 

Turned out to be a fabulous plan.  When the kids got bored, they would ask to pick from the jar, and we'd get to work creating or playing.  It was great for me too, because it was a way to make sure I stopped and played along with them as well (in between the loads of laundry that never end).  After the summer was over, we got busy again and stopped going to the jar for activities.  Also at some point over the fall and winter, my daughter took a fancy to playing with (and subsequently losing) the popsicle sticks, choosing to draw on them with crayons, and basically disassembling our "boredom busters."

When I saw today's CraftySteal, the KI Memories Juicy Summer Collection, I knew it was the perfect kit to revive my sad little summer-saving buckets.  Today's steal comes packed with some gorgeous shimmer papers, (the photographs don't do the shimmer justice),
bright glitter papers,
fun lace papers,


and card stock letter stickers, epoxy stickers, and ribbons.


When I got my hands on it, I got to work re-making the jars that saved me last summer (in hopes that they will do the same again!).
Here's what you need to make your own summer boredom busters:

Buckets (I found mine in the Target dollar bins)
Patterned paper
Wooden Craft sticks
Ribbons and other embellishments
Adhesive (I used a glue gun for sticking paper to the metal bucket, and a glue runner)

Cut the patterned paper into strips (mine ranged from 1" to 1.5" wide).
Cut a strip to a desired length and fold it in half.  Unfold it, put adhesive on it, and wrap it around a craft stick.
Now you can pull out your edge punches, or dust off your decorative edged scissors (yes, I know you still have some!) and fancy up your sticks.  I also used stickers and ribbon to dress my sticks up.
Next step is to write down activities on the sticks.  (Make sure to get ideas from the kids!)
Now you can decorate your bucket (or buckets in my case - I made one for sunny day activities and one for rainy day activities) and fill it with the finished sticks.  (I filled the bottom of my buckets with glass stones to make the sticks stand up a little bit better).
Voila! Summertime boredom solved!  If you are looking for ideas about more activities to put on your sticks, check out this cool free printable of "101 bit of summer fun" made by Laura Winslow Photography (that I found via a link from the TomKat Studio):
Now, if you don't have to worry about distracting children this summer, you can make yourself a bucket of projects you'd like to do this summer, or maybe books you want to read, or movies you want to watch. Or even use this idea in its original form and use it to kick your creativity into gear, maybe listing trips or events you'd like to eventually scrap (and then actually having to start scrapping when you draw the stick!). 

Then, when you've finished this project, you can use the other papers and embellies from today's steal to scrap your sunny adventures, decorate for a summer pool party, or make a simple birthday card for a friend (like I did)...
Have a fabulous day, and Happy Crafting!