Sunday, July 24, 2011

We've moved!

Just in case you haven't heard yet, the new CraftySteals.com website also has a great new blog!

All *new* posts are being posted at our new home at
blog.craftysteals.com. (We are currently working to move our archives over to the new site).


See you all over there!

Friday, July 8, 2011

Feature You Friday - Shades of Blue Blog

Good morning CraftyStealers!

I hope you all had a fantastic holiday weekend, and got the chance to do a little bit of creating.  Today's feature is a blog by your fellow CraftyStealer, Serene, called Shades of Blue.  Serene is quite the mini-album maker, and if you like minis, you will get to see some gorgous ones if you visit her blog. 

A little about Serene...
I’m Serene Blascovich, a full-time working mom and wife from NY.  I’ve always been a creative person but until I discovered scrapbooking, I never really found my niche.  After being introduced to scrapbooking by my aunt about 4 years ago, I slowly ventured into this wonderful world.  Once I’d made my first layout, I was hooked.  I love learning new techniques and finding ways to incorporate them into my projects.   While I immensely enjoy making layouts, I especially like making mini albums.  Upon completion of a mini album, I get such a feeling of accomplishment.  

This fulfilling hobby has become my passion which allows me a creative outlet, a way to relieve stress, and at the same time I am creating a legacy for my family.  Scrapbooking has also allowed me to meet amazing and talented people who fill my life with joy and inspiration.
Here are a few of Serene's creations.

A baseball mini for her son...
A very cool expandable mini...
And her latest mini... 
So colorful and fun! Be sure to go say hi to Serene and check out her Shades of Blue blog. 


Have a great weekend!


Would you like to be featured on a future “Feature You Friday”? It’s a great way to show off your skills, share your talents, or promote a business, blog or cause that’s dear to you.  All you need to do is send us a photo (or photos) of a project (layout, card, altered item, your imagination is the limit!) to the CraftySteals blog at blog@craftysteals.com. If you are chosen, your work (and links) will be seen by all of our CraftySteals Blog readers and Facebook fans.  Submit your photos today – we can’t wait to see what you have come up with!

Sunday, July 3, 2011

Sunday School - Mission: Organization (The Paper Problem)

Okay CraftyStealers, it’s time for another round of Mission: Organization! We’ve already organized our punches , our scraps, and our clear stamps.  Today, I’m tackling the big dog.  That's right folks, I'm taming the patterned paper.  As some of you may remember, when I first introduced myself at the beginning of the year, I admitted that I am a hoarder of patterned paper.  Try as I may, I just can’t resist a pretty piece - and working at CraftySteals hasn’t helped matters much. :)

Now, we all know that organizing paper is very personal.  What system works for one may not work for another.  We all work in different ways, right? What kind of scrapper you are determines the best way to organize your paper stash.  What kind of scrapper am I? Well, I tend to be a person that buys paper I love even if I have no project in mind for it.  Down the road, I might take a picture and think “Oh, that Bella paper would be perfect for these pictures.”  But chances of me figuring out exactly WHERE that paper is, didn’t used to be so good.  In fact, many times I have lost my mojo because it took me so darn long to find the right paper (or I spent the whole 30 minutes of spare time I had and have zero left to get any actual craft work done!).  I wasn't getting any real paper crafting done and something needed to change.  Since I knew I wasn't going to be able to control the patterned paper hoarding beast inside, I could at least figure out how to control how the paper is stored.

Before I embarked on this paper project, I had paper stashed all over my craft room.  In drawers, under my desk and even crammed in clear plastic storage boxes in random rooms in my house.  See?

The papers were not in a convenient place or stored in a way that made me WANT to look through them.  (Not that it ever stopped me from acquiring more!).  Since I am trying to make an effort to use up my stash, I knew I needed to make it more accessible.  I think I did a pretty darn good job at making paper easy to find while making sure my craft room looks good too.  So here’s what my tips are for you:

Purge. 
Go through your stash and take out any papers that don’t appeal to you.  Now I’m not saying throw them away, but if you really don’t think they go with your style, there’s no point in letting them take up valuable crafty real estate! If you have enough you could try to sell them (Ebay or Craiglist could work), give them to a friend, your children, or see if a local church, school, nursing home or hospital might like them.  If all else fails, you could try Freecycle.  This freed up a LOT of space for me.  I've been collecting paper for about 12 years and as much as I hate waste, I knew I would never use this some of these papers (like this one, that I think is still pretty, but doesn't go with my style anymore)
Sort. 
Here’s where it gets personal.  You can sort by color, by theme, or by manufacturer (I’m sure there are other ways too, but these are the ones I thought of).  I did a little bit of everything.  If I had a lot of papers from a specific line, I sorted by line and manufacturer.  I sorted some of my papers into themes: Holidays, School, Sports, Travel, Characters (Thomas the Train, Disney).  Then whatever was left over was sorted by color (I sorted patterns by choosing the dominant color in the pattern).  My cardstock was all sorted by color.  Stacks were left in stacks to be dealt with as a group.

Choose your containers carefully AFTER you see what you need and how you will use it! (in other words, don't just buy pretty boxes because they are on sale!)
As you can see in my photos, my storage was mainly horizontal storage.  I didn’t like that at all.  I find it soooo much easier to thumb through paper that is stored vertically.  Making the decision to store all my paper vertically made it easy to get rid of some organizers I already had (that weren't doing their job). I sold my wire paper organizing rack that was under my desk (It was doubly hard to look through paper when I had to crouch under my desk!) and emptied my drawers. 

Instead, I invested in some clear Cropper Hopper Paper Storage bins to store on the top of the shelves in my craft room.  I labeled each Cropper Hopper (using my trusty label-maker) with the names of each manufacturer and line. Many paper kits came in their own plastic sleeves, so I used those to store the individual lines.  I also purchased some black and white envelopes (I just lucked out that I found some on clearance and they match my craft room) to hold more paper lines by manufacturer.  Another cheap idea is to buy massive Ziplocs. Again, I labeled each envelope with my label-maker (love that thing!)  The Cropper Hopper that stores the themed paper has dividers (each divider is labeled with the contents).  I tend to buy cardstock for backgrounds – mostly white, cream and kraft.  Other colors, I usually buy piece by piece on a project basis, and now ALL of my cardstock is now stored by color in one Cropper Hopper. 
As for my 6X6 pads (I’m beginning to acquire these as I LOVE the versatility of them), they are now stored in a DVD storage box (Thanks IKEA!)
Last thing I had to deal with was paper stacks.  Before I started getting sucked into the world of individual papers, I bought a couple of stacks.  I do like to use these for cards and mini albums (since there are so many coordinating papers).  Luckily, I have a storage shelf built into my desk that is perfect for storing stacks.  I labeled the spines so that I can easily find the one I need (and don’t forget to use it since it won’t be hidden in a drawer anymore!
It has made a world of difference even in the short week I’ve had it finished.  When I got some pictures developed I was actually able to FIND the papers I had "matched" them to in my head.  Miraculous! (Well, miraculous that I finally buckled down and got everything organized).
Hope my tips helped you a bit.  Tell us, how do YOU store your papers? Any fun and creative ways you’ve come up with to make shopping your stash any easier?

Happy Crafting!

Friday, July 1, 2011

Feature You Friday - Bling-ing Tees

Good morning CraftyStealers!

We always love to see CraftySteals in action - especially showing up in the creations of a stay-at-home mom run business! Bling-ing-tees.  Shannon makes custom shirts, onesies, diaper cloths, burp cloths and more for anyone who needs a little bling in their lives.  (Don't we all?)  She got started with some rhinestones from a steal and now can't stop blinging things...
 "As a mom of boys I never get to sparkle my kids out; however I do love some bling for myself. I have started making custom designed shirts for girls, mommies, and yes even the boys (minus the bling, of course!). Birthday shirts, holiday shirts, Soccer Mom, Cheer Mom, the possibilities are endless. I can design something for you or you can pick something I have already created."
Here are a few of Shannon's creations:


There are many more fun items to see on her Facebook Page, Bling-ing-tees (and you can also ask Shannon any questions or request a custom item through her page).  Go check it out and you just might have to "like" her bling!
Have a great Friday everyone. 


Would you like to be featured on a future “Feature You Friday”? It’s a great way to show off your skills, share your talents, or promote a business, blog or cause that’s dear to you.  All you need to do is send us a photo (or photos) of a project (layout, card, altered item, your imagination is the limit!) to Andreana at blog@craftysteals.com.  If you are chosen, your work (and links) will be seen by all of our CraftySteals Blog readers and Facebook fans. Submit your photos today – we can’t wait to see what you have come up with!

Monday, June 27, 2011

Are you our Birthday Sketch Challenge Winner?

Good morning CraftyStealers!

I hope you all had a fabulous weekend filled with time for crafting and creating.  I was able to squeeze in some time for a little organizing (which I'll tell you more about on Sunday), but sadly didn't get too much time to play.  I *did* however, get a chance to check in on your entries for our Birthday Sketch Challenge.  You ladies never disappoint! I loved seeing the variety and creativity each of you brought to the sketch. 

Our winner, picked by random.org, is.... Annette G
Congratulations! Please send an email to service@craftysteals with your mailing address and we'll send out your goodies.

We had such a blast with this challenge that we are thinking of doing them more often.  What do you think? Would you like to see more sketch challenges?  Let us know what you think.

A big thanks to all of you crafty ladies who participated in our first ever sketch challenge! 

Have a great night!


Would you like to be featured on “Feature You Friday”? It’s a great way to show off your skills, share your talents, or promote a business, blog or cause that’s dear to you.  All you need to do is send us a photo (or photos) of a project (layout, card, altered item, your imagination is the limit!) or a link to your blog, Etsy store or Facebook page to me (Andreana) at blog@craftysteals.com. 


If you are chosen, your work (and links) will be seen by all of our CraftySteals Blog readers and Facebook fans.  Submit your photos today – we can’t wait to see what you have come up with!

Sunday, June 26, 2011

Sunday School Tutorial: 3-Ring Binder Mini Album

Good morning CraftyStealers!

 
I gave you all a sneak peek of my American Crafts Confetti Birthday mini on Thursday, and as promised, I will show you how I did it.  I chose this design because I need a mini-album that I don't think my kids will rip apart.  Having two small children, I've always been a little bit wary of putting time and effort into an album that may or may not stand up to little fingers.  Then, I came across this tutorial on YouTube, from FollowThePaperTrail, and thought it was the BEST idea! (By the way, she is a mini-album genius, and has many more tutorials and patterns).  It's basically a do-it-yourself 3-ring binder.  It was SO easy, and I'm crossing my fingers that it will be able to endure my kids thrashing it for years to come.

 
Here's what you will need:

 
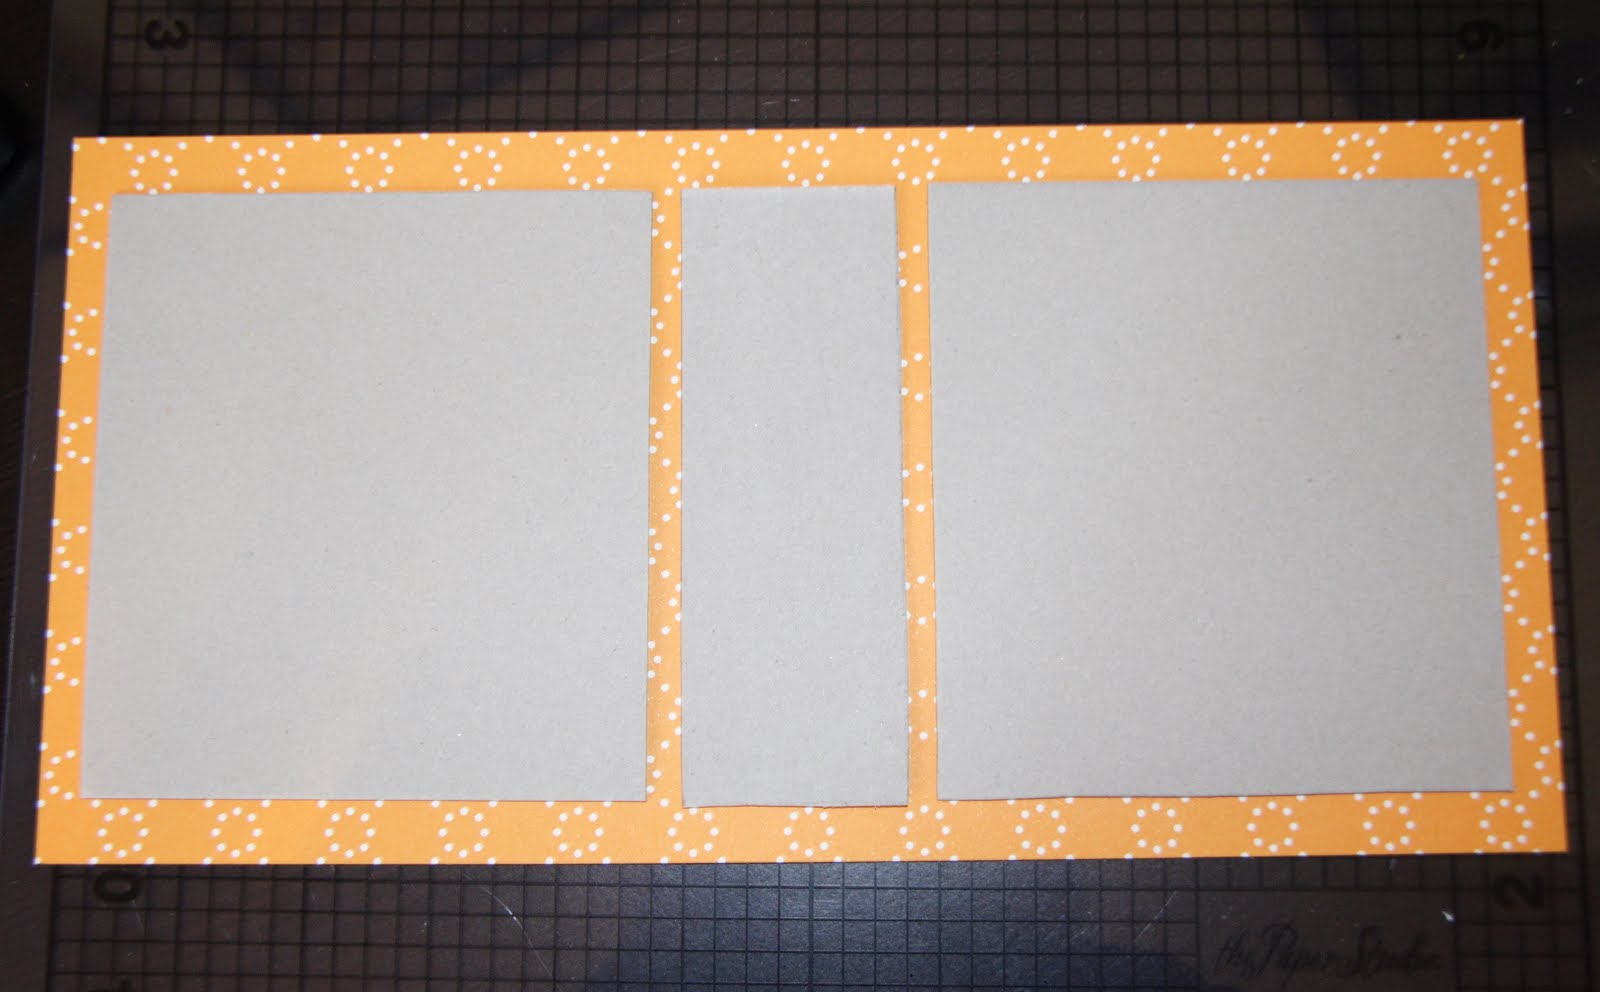
  • Plain chipboard cut into three pieces: 2 pieces that are 4.5"x5", 1 piece cut to 4.5"x1.75" (I used a sheet of plain 12"x12" chipboard)
  • 1 - 6"x12"piece of patterned paper
  • 1 - 10.5"x4.75" piece of coordinating patterned paper (you can just use a piece of double sided patterned paper to make both)
  •  3 - 1" binder rings
  • Heavy duty hole punch with a long reach (I used a WRMK Crop-A-Dile Big Bite)
  • REALLY good adhesive
  • 4"x4" pieces of double-sided patterned paper (for album pages, so as many as you'd like)
Apply adhesive to one side of each of the 3 pieces of chipboard.  Place them adhesive side down onto your 6"x12" piece of patterned paper as shown below, making sure to put the side of your patterned paper with what you would like to be your cover pattern, facing down. 

Snip off the corners of excess paper at a diagonal - but don't cut too close to the corner of chipboard.
Now put adhesive along the edges of paper and chipboard.  Fold the short edges of the paper onto the chipboard to "wrap" the chipboard.  Do the same with the longer edges.  Make sure the paper is firmly adhered to the chipboard.
Now you take your coordinating 4.75"x10.5" paper and put adhesive along the outer edges of the "wrong" side.  This will be the inside of the cover. Centering this piece, place it on top to cover the remaining naked chipboard.
Now bend the cover at the seams.
Time for the ring part of this three ring binder.  The vertical placement of your rings is up to you.  I spaced my evenly along the spine.  So I put dots at 1", 2.5" and 4" along the lenth of my 5" spine.  Then I made another identical set of dots 1" to the right.
Punch out the holes, making sure the hole will be big enough to accomodate the width of your ring. 
Wiggle the rings into the holes so that the clasps are on the inside and the joint is along the outside of the spine.
Outside cover is finished! All that is left is to fill it up with pages.  I made my pages fairly simple - all but one are 4"x4" sqaures.  The last page is 4"x7" and folds out.  I did this because I made these minis to showcase pictures I took each month of my child's first year - and wanted to make the 1st birthday page a little bit more special.  I added journaling to each month's page, citing a few special things (walking, words, favorites) at that point in their new little life.  Here is the finished product!
And of course since it would be unfair to make one for my son and not for my daughter, here is the girlie version.  I let my kids pick out the cupcake stickers for the covers.  The strips at the top are patterned bar code strips - such a great idea from American Crafts so that nothing goes to waste!
If you missed this AC Confetti Birthday steal, there are a few left and Stephanie has added them to our Past Steals page! I hope you get to steal some time and have fun playing with your papers today.  Don't forget to take a few minutes to create something awesome to enter in our Birthday Sketch Challenge.  It closes tomorrow evening and our winner will get some fun CraftySteals goodies...

 
Have a great Sunday!

Thursday, June 23, 2011

Happy Birthday to CraftySteals! (We've got party favors and games for you!)

Good morning CraftyStealers!

I know it's early in the morning, but go get yourself a piece of cake (or ice cream if you've got it!).  Today starts our celebration of a wonderful two years of steals here at CraftySteals.com!  We have a few special things in store for you, our awesome customers, to thank you for coming back over and over again and for sharing us with all of your friends and fellow crafters. 
First of all, Stephanie has put together a FABULOUS American Crafts kit for today's steal - it is filled with colorful double-sided papers and tons of embellishments from this year's Confetti line.  Get one for yourself, and you will definitely be inspired by this great collection. PLUS, if you buy today's steal, you'll also get a free gift from CraftySteals while supplies last! (Just a note: I've been playing with this steal for just a few days and have already knocked out four cards and two mini-albums - you will not believe how much is in this deal! )

Today we are also having our first ever CraftySteals.com sketch challenge! All you have to do is loosely base your card or layout on this sketch.  Then upload a photo of your challenge entry using the LinkyTools list at the bottom of this post.  We'll randomly pick one of the entries to win a suprise package of CraftySteals goodness.   Are you up for the challenge? If so, you have from now until Monday at 5:00 p.m. CST to create your own version of this simple sketch (flip it if you need to and make it your own, just keep the general idea!):

Here's a couple of cards I made using the AC Confetti steal:
So to recap what's going on at the CraftySteals 2nd birthday fiesta:
1.  Grab your American Crafts Confetti steal today (with your free gift while they last). 
2.  Go play with your stash and create away with our Birthday Challenge sketch.  When you are done, be sure to enter your photo below to win some fun CraftySteals goodies!
3.  Check back in tomorrow for another awesome birthday steal. (Because we can't have only one day of partying at CraftySteals.com, can we?)

Thanks to each and every one of you for being such wonderful customers, and for supporting CraftySteals.com.  We look forward to many more years of bringing you incredible steals!

Oh, and if you need to do a little organizing, you may want to check out today's StitchSteal.  We're partying over there for StitchSteals.com's very FIRST birthday - but I warn you, you may find yourself addicted to stealing over there too...
Come join the Birthday Sketch challenge!