Showing posts with label Ribbon. Show all posts

Tuesday, May 17, 2011

American Girl Art and Message boards - Get one for your daughter and two for you!

Good morning CraftyStealers!

When Stephanie told me about today's steal, I was so excited to check it out. You see, as soon as I heard the word "board", I had a project in mind (you know how it is, there's always something you've been meaning to make - and I have a very long "to-do" list!).  I saw the American Girl Art and Message Board, I knew it would be perfect!

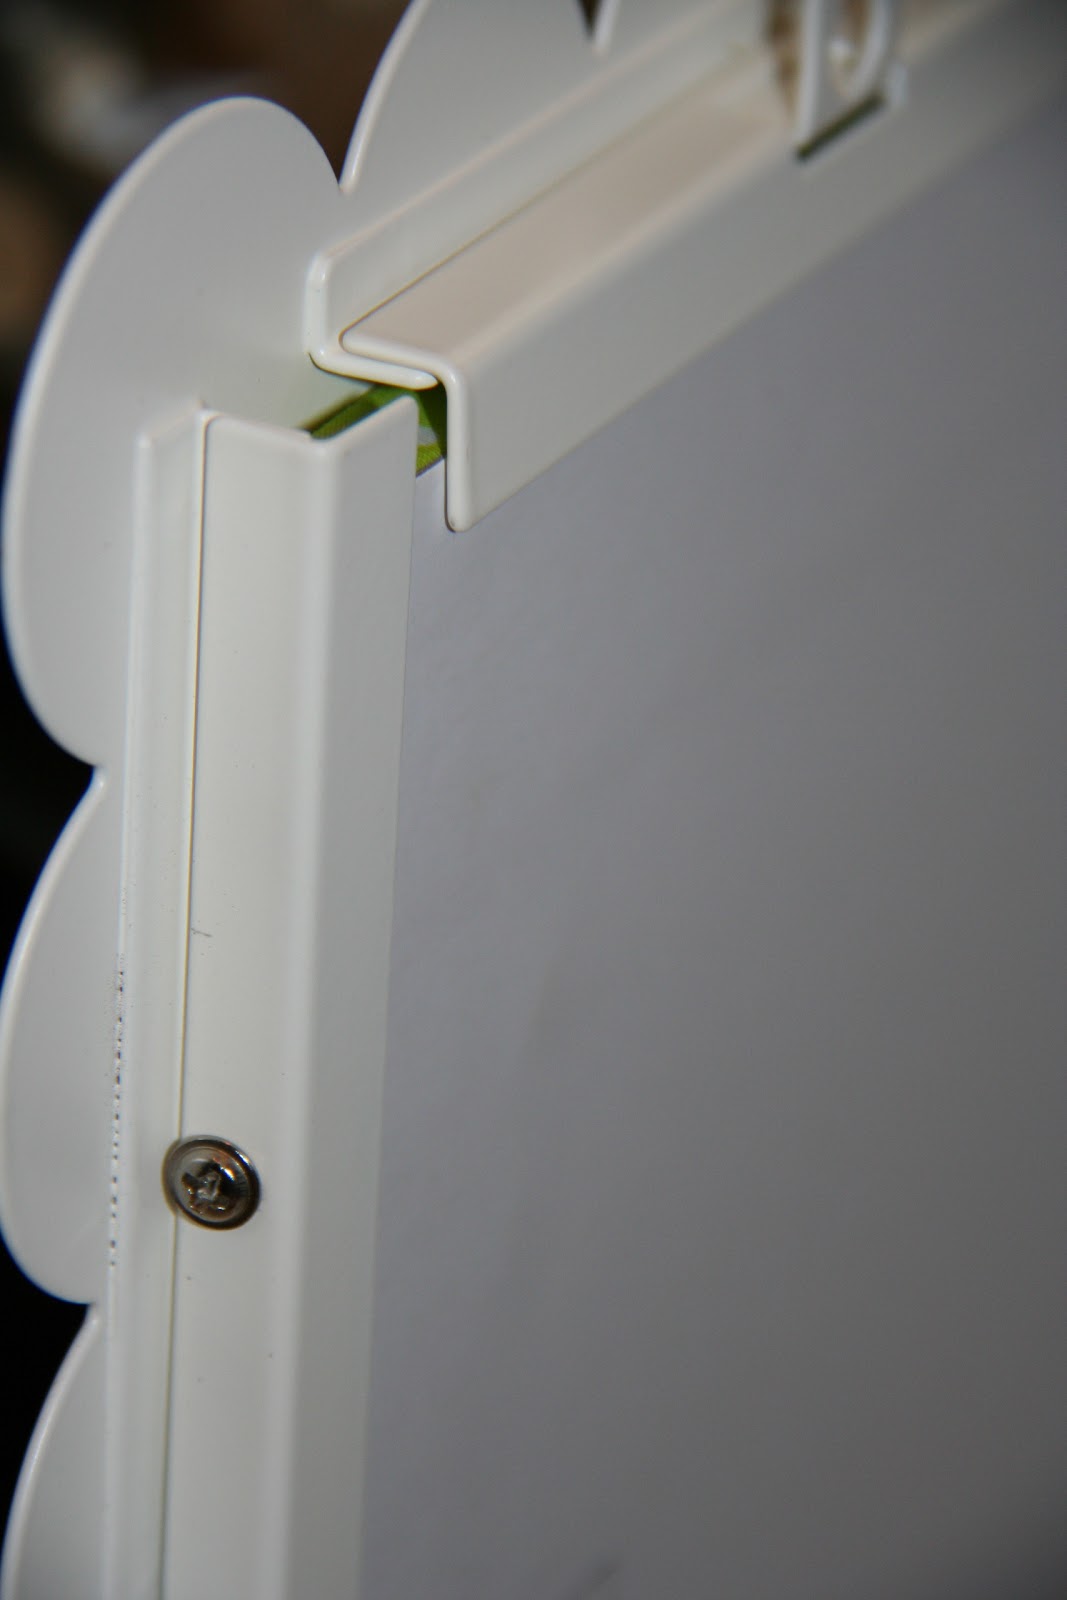
Before I share my project, let me tell you a little bit about these boards. Each one is a bulletin board, covered tightly in fabric, and surrounded by a white metal frame. They have two keyholes in the back for easy hanging. The cool thing about these boards, is that the board is held into the frame with screws. So if sometime in the future you'd like to change the fabric with the decor of your room, it will be very easy to do so! Here's a peek at the back:
Another great thing is the size - they are 11x14. So you could get a few and make a wall of boards, or you could hang one where you may not have much space, say above your desk in your craft area for an inspiration board:
The white frame is a great canvas for any kind of embellishment or even paint markers! On the above board, I used some adhesive pearls by Creative Charms to dress up the scallops while still leaving it simple. Below, I used some fun butterfly and flower embellies from Creative Charms to make it look pretty while holding all of the treasures my preschooler comes home with.
Now, back to the project I originally had in mind when I heard about the boards.  This project kicks it up a notch from a plain old bulletin board. I took some ribbon that coordinated with my daughter's purple and green big girl room, and made it into a bow, barrette and accessories holder. I hung it low enough for her so she could have fun choosing her own bows (and maybe that will also help her put them away! Wishful thinking, right?).
Another fun thing to do is to fancy up some plain thumbtacks by adding any spare embellishments. On these boards I used pearl and gem adhesives, crocheted butterflies, sequined flowers and large gem brads (with the prongs removed), all from Creative Charms, and glued them to the ends of clear pushpins. Super cute and ridiculously easy (and if you need some more to replenish your stash, check out the different embellishment bundles on the CraftySteals Past Steals page!).

So go grab yourself this CraftySteal, make it your own, and then don't forget to come back and share a picture on our Facebook wall to show us how you are using it!

Happy Crafting!

Sunday, May 15, 2011

Sunday School - Bows, bows, and a knot!

Good morning CraftyStealers!

Last week, on National Scrapbooking Day, many of you took part in our challenges on Facebook. One of them called for projects with ribbon - and boy did you all show us some creative ways to use ribbon! We wanted to make sure all of you ribbon lovers have stocked supplies, so today's CraftySteal is an American Crafts ribbon box!

Looking over all of your beautiful ribbon projects, I thought it might be fun to have some bow and knot tutorials for Sunday School today. Especially since (don't laugh) I actually had to RESEARCH how to tie a bow (well, how to tie a pretty bow!) when I first started scrapbooking. It's harder to get those perfect bows than you would think!

So let's start out with the basic bow:

Take a length of ribbon and make two loops (aka "bunny ears").
Cross one loop over and under the other (just like tying a shoe).
Pull through and straighten out, adjusting the middle.
Now you can trim the ends to make sure the length is to your liking. Trim at and angle to make sure they don't fray.  Now you can glue the bow to anything!
Next up, are two ways to tie ribbon directly on your paper - one is a knot, the other takes the knot up a notch and makes it a bow.

For the knot, first you punch your paper using a ribbon or rectangle punch (or cut two slits in the paper if you don't have a punch).
Thread each end into a hole, coming from the front to the back.
Cross one side over the other, and thread the ribbon through the opposite hole, feeding it from back to front.
This is your knot, and you can trim the edges to your desired length.
This next bow, is a little more complicated, but I personally think it looks much more neat than a bow I tie myself and glue on.

First, punch your paper using a ribbon or rectangle punch.
Take a length of ribbon and put each end of the ribbon through one hole, going from front to back. This will become the middle of your bow.
Now, turn your paper over and cross the ribbons in the back.
Bring each ribbon end up through the opposite end it went down through.
Each of these ends will now become the loops of the bow. Take each end back through the holes (going back through the same hole, but don't pull it all the way back out - leave some sticking out - as long or as short as you would like your loops to be).
Now turn the paper over and cross the ribbon ends one more time.
Pull the ribbon ends up through the opposite holes. These will become the tails. You can cut these as long or as short as you would like them to be!
 Pretty, isn't it? So what about you, what is your favorite bow to make? Feel free to share here or on our Facebook wall, we love to learn new techniques!

Also, if you are looking for some inspiration for what to do with all of the ribbon you will get in today's steal, take a look at our Facebook photo album and see the entries for the ribbon challenge - there were a ton of beautiful cards and pages shared! In fact, the first card I posted today, was inspired by this card that Melissa D. posted on our wall (except mine doesn't do hers justice!).

Have a great Sunday, and happy crafting!